| |
Mapping an environment with Volta simulation
Description: Use of gmapping with Volta simulationKeywords: Volta
Tutorial Level: INTERMEDIATE
Next Tutorial: Running AMCL with Volta simulation
Mapping the Environment
The following tutorial illustrates the use of gmapping with Volta simulation. You will require the repository for Physical Robot here and the repository for Volta_Simulation here for this tutorial. You can also refer to this guide here on installing the repositories.
To learn more about move_base, gmapping and the navigation stack, refer to the Navigation tutorials.
Instructions:
- Once the gazebo world is launched and the Volta robot is loaded into the simulation environment, the mapping node can be launched by running:
$ roslaunch volta_navigation navigation.launch gmapping:=true
- This will launch the gmapping node. On a separate terminal, launch the rviz visualization tool by running:
$ rosrun rviz rviz
You can then open the volta configured rviz environment by opening the volta rviz config file, located under volta_navigation->rviz_config->navigation.rviz, from the rviz tool

- In order to control the robot, launch the teleoperation node by running:
$ roslaunch volta_teleoperator teleoperator.launch keyboard:=true
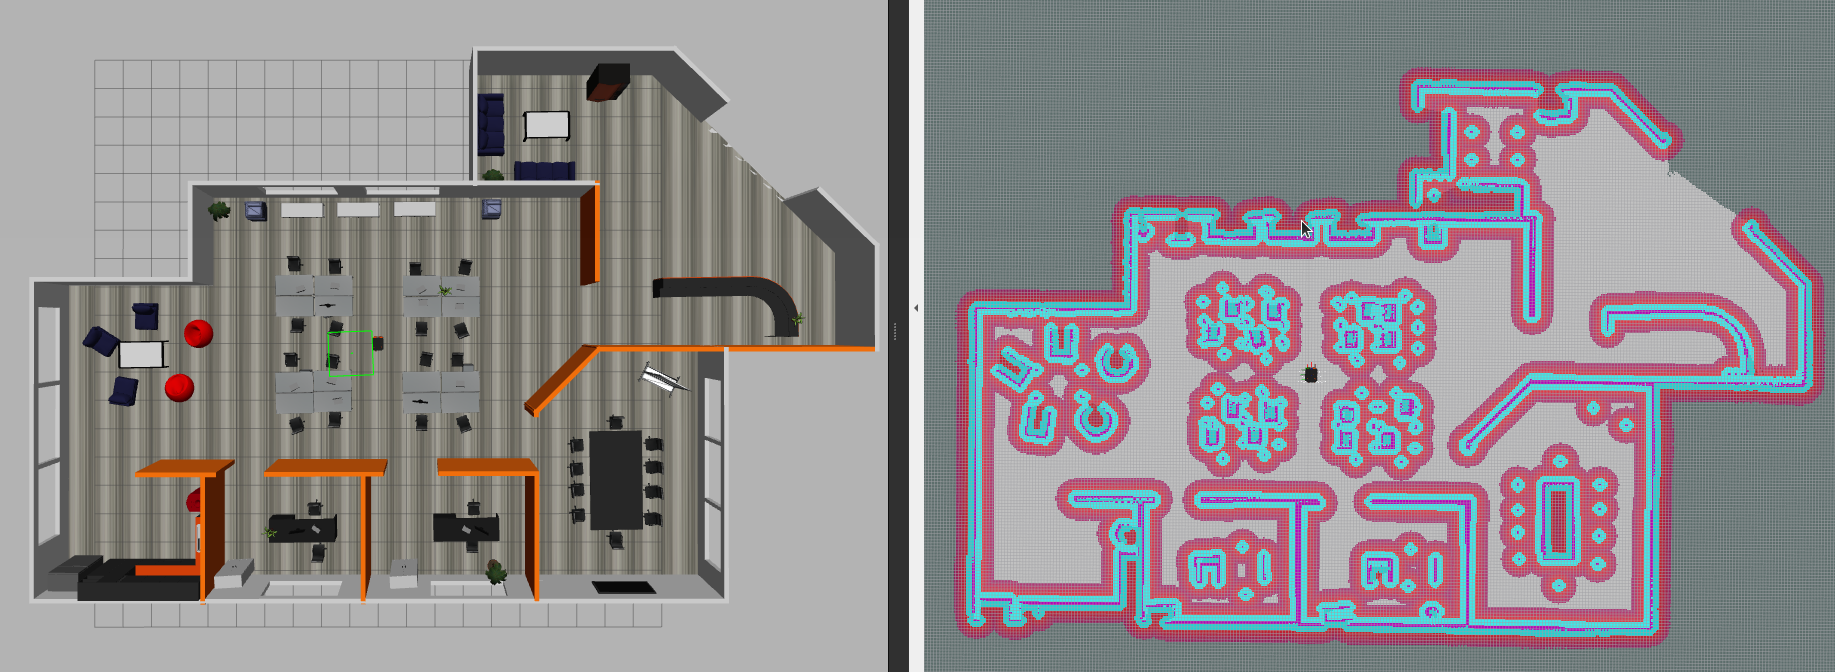
- As the robot moves, a grey static map will grow.
- Once the mapping of the entire environment is completed, the map can be saved by running:
$ cd ~/volta_ws/src/volta/volta_navigation/maps
$ rosrun map_server map_saver -f <filename>
With Depth Camera
The following tutorial illustrates add on of Camera with Volta and visualizing the depth cloud on RVIZ.
To learn more about visualization on RVIZ and Gazebo plugin models, you can refer to the tutorials on Gazebo Plugins.
Instructions:
- To include the point cloud in the simulation, the following changes have to be made in the Volta urdf files.
You can then open the volta configured urdf by opening the volta urdf file, located under volta_description->urdf->volta.urdf.xacro on the file explorer
- Change arg name=”camera_enabled” default =”true” as below
<xacro:arg name="camera_enabled" default="true"/>
Next, open the camera configured urdf by opening the camera urdf file, located under volta_description->urdf->accessories->camera_volta.urdf.xacro on the file explorer
- Enable the camera which you desire to use in simulation. For instance, to view the point cloud data using Intel_d435i, change the argument intel_d435i_enabled to true and the other camera's to false, as below
<xacro:macro name="camera_" params="frame:=camera topic:=camera info_topic:=camera_info update_rate:=50 intel_d435i_enabled:=true orbbec_astra_pro_enabled:=false robot_namespace:=/">
- Once the gazebo world is launched and the Volta robot is loaded into the simulation environment, the mapping node can be launched by running:
$ roslaunch volta_navigation navigation.launch gmapping:=true
- This will launch the gmapping node. On a separate terminal, launch the rviz visualization tool by running:
$ rosrun rviz rviz
You can then open the volta configured rviz environment by opening the volta rviz config file, located under volta_navigation->rviz_config->navigation.rviz, from the rviz tool
- In order to control the robot, launch the teleoperation node by running:
$ roslaunch volta_teleoperator teleoperator.launch keyboard:=true
To visualise and picture the Depth Cloud, you can select the “Add” button -> By Topic ->/camera -> /camera ->/camera as illustrated in the video below


